Microsoft Xbox: Difference between revisions
Jump to navigation
Jump to search
No edit summary |
(→Disassembly Notes: Changed wording. Creating seprate disasmbly page) |
||
| Line 31: | Line 31: | ||
== Disassembly Notes == | == Disassembly Notes == | ||
The four rubber feet on the underside of the device are held in with strong adhesive. If you want them to remain after disassembly, peel them back just enough to expose the screw heads. | |||
== Original Parts == | == Original Parts == | ||
=== Basic PCB Name === | === Basic PCB Name === | ||
Revision as of 15:51, 9 February 2022
- For general information, see more on Wikipedia: Xbox
| This device is in the WorkNeeded:OriginalParts category because it was flagged as missing information on the original parts. It may have replacement parts listed but those cannot be assumed to be identical to the originals. If you have a list of the original parts, please feel free to add them by copying the relevant table from EditorsToolbox:Tables |
| This device is in the WorkNeeded:ReplacementParts category because it was flagged as missing information on replacement parts. If it has the original parts listed you may be able to search for replacements using the parametric searches available from parts distributors. If you have or make a list of replacement parts, please feel free to add them by copying the relevant table from EditorsToolbox:Tables |
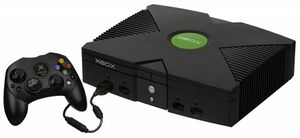
Microsoft Xbox
| Preliminary Information | |
|---|---|
| Release Year | 2001 |
| Leak Risk | High |
| Batteries | None |
| Mounting Technology | Through Hole, SMD, BGA |
| Capacitor Types | Aerogel, Supercapacitor |
| Destructive Entry | No |
This is a template page for creating new pages for devices, troubleshooting them, part lists, and other repair info.
Known Issues
Internal clock resets upon power loss
Causes
- The aerogel supercapacitor responsible for keeping the RTC online has failed.
Solutions
- Replace the capacitor.
- Remove the capacitor, but manually set the time upon rebooting after power loss.
- Connect your Xbox to the internet so that it can synchronize (requires custom dashboard) with a timeserver on boot.
Disc drive no longer reads discs
Causes
- The rubber drive belt has degraded
- The read laser has failed
Solutions
- Replace the drive belt
- Replace the entire drive
Disassembly Notes
The four rubber feet on the underside of the device are held in with strong adhesive. If you want them to remain after disassembly, peel them back just enough to expose the screw heads.
Original Parts
Basic PCB Name
| RefDes | Qty | Capacitance | Voltage | Mount | Diameter/Size | Temp | Type | Brand | Series |
|---|---|---|---|---|---|---|---|---|---|
| 0 µF |
Replacement Parts
Basic PCB Name
| RefDes | Qty | Compatible Part Number | Order Links |
|---|---|---|---|
| Digikey |
If parts are not available or different selection is preferred, you can use the values in the Original Parts section to perform a parametric search.
Kits
- Digikey BOM: https://www.digikey.com/
