Chauvet Ovation Spot: Difference between revisions
Millstream (talk | contribs) (New page.) |
Millstream (talk | contribs) mNo edit summary |
||
| (4 intermediate revisions by 2 users not shown) | |||
| Line 7: | Line 7: | ||
|Destructive Entry = No | |Destructive Entry = No | ||
}} | }} | ||
==Known Issues== | ==Known Issues== | ||
===Symptom or Problem Encountered=== | ===Symptom or Problem Encountered=== | ||
No response when plugged in. No display on control panel. | No response when plugged in. No display on control panel. | ||
====Causes==== | ====Causes==== | ||
*Shorted diode on control panel board. | *Shorted diode on control panel board. | ||
| Line 30: | Line 28: | ||
Recheck for shorts. | Recheck for shorts. | ||
== Reassembly Notes == | == Reassembly Notes == | ||
Take care not to overtighten the screws, especially if corrosion was evident as this will have degraded the threads in the body. | Take care not to overtighten the screws, especially if corrosion was evident as this will have degraded the threads in the body. | ||
Add anti-sieze compound or suitable grease to prevent further corrosion bearing in mind that this can aggravate over tightening. | Add anti-sieze compound or suitable grease to prevent further corrosion bearing in mind that this can aggravate over tightening. | ||
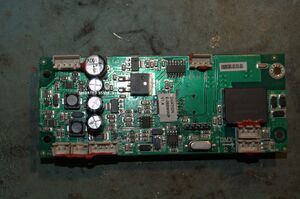
[[File:Control board.jpg|thumb|Shows location of faulty component]] | [[File:Control board.jpg|thumb|Shows location of faulty component]] | ||
==Original Parts== | ==Original Parts== | ||
===Control board=== | ===Control board=== | ||
| Line 54: | Line 51: | ||
|DO214 | |DO214 | ||
|} | |} | ||
{| class="wikitable sortable" | |||
|+Capacitor [[Capacitor Specifications|Specifications]] and [[Part Footprints|Footprint]] Information | |||
!RefDes | |||
!Qty | |||
!Capacitance | |||
!Voltage | |||
![[Part Footprints|Mount]] | |||
!Diameter/Size | |||
!Height | |||
!Lead Spacing | |||
!Temp | |||
![[Capacitor Types|Type]] | |||
!Brand | |||
!Series | |||
|- | |||
| | |||
|1 | |||
|47 µF | |||
|100 V | |||
|SMD | |||
|10mm | |||
|10.5mm | |||
|4.7mm | |||
|105°C | |||
|Aluminum Electrolytic | |||
|Semtech | |||
|CS | |||
|} | |||
==Replacement Parts== | ==Replacement Parts== | ||
''If parts are not available or different☃☃ selection is preferred, you can use the values in the [[#Original_Parts|Original Parts]] section to perform a parametric search'' | ''If parts are not available or different☃☃ selection is preferred, you can use the values in the [[#Original_Parts|Original Parts]] section to perform a parametric search'' | ||
{| class="wikitable sortable" | |||
|+Capacitors | |||
!RefDes | |||
!Qty | |||
!Compatible Part Number | |||
!Order Links | |||
|- | |||
| | |||
|1 | |||
|UUX2A470MNL1GS / UUR2A470MNL1GS | |||
|[https://www.digikey.com/en/products/detail/nichicon/UUX2A470MNL1GS/2550559 Digikey] [https://www.mouser.com/ProductDetail/Nichicon/UUX2A470MNL1GS?qs=jZZh9D7uMhmPZMofMKn2Fg%3D%3D Mouser] [https://www.lcsc.com/product-detail/Aluminum-Electrolytic-Capacitors-SMD_Nichicon-UUR2A470MNL1GS_C445216.html LCSC] | |||
|} | |||
==References== | ==References== | ||
<references /> | <references /> | ||
[[Category:WorkNeeded:ReplacementParts]] | [[Category:WorkNeeded:ReplacementParts]] | ||
[[Category | [[Category:Stage, theatre]] | ||
Latest revision as of 09:53, 25 March 2024
Chauvet Ovation spotlight with strobe. and DMX.
| Preliminary Information | |
|---|---|
| Batteries | None |
| Mounting Technology | Through Hole, SMD, BGA, Sockets |
| Capacitor Types | Aluminum Electrolytic, Tantalum, Ceramic, Polymer |
| Destructive Entry | No |
Known Issues
Symptom or Problem Encountered
No response when plugged in. No display on control panel.
Causes
- Shorted diode on control panel board.
Solutions
- Replace shorted diode.
Disassembly Notes
Remove the back of light with a long 3mm hex key. These may need soaking with penetrating oil and a tap with a hammer and suitable punch. An 8mm dia. rod is ideal.
With the back disconnect this part from the rest of the light. Lay this part, fan upwards on the bench.
Remove the seven 3mm hex screws and separate the parts.
The control board will need to be removed from the housing as it's to difficult to work on otherwise, so remove all the connectors from the board. Noting the position of the two adjacent 2 pin connectors. The red glue will need to be carefully cut with a scalpel to allow most of the connectors to separate. Take care not to cut other wires or yourself doing this.
With the board out use a multimeter to check across the two diodes show in the image.
Remove the shorted on and replace with same type.
Recheck for shorts.
Reassembly Notes
Take care not to overtighten the screws, especially if corrosion was evident as this will have degraded the threads in the body.
Add anti-sieze compound or suitable grease to prevent further corrosion bearing in mind that this can aggravate over tightening.

Original Parts
Control board
| RefDes | Qty | Value | Voltage | Mount | Footprint |
|---|---|---|---|---|---|
| 2 | SS310 | 100 | SMD | DO214 |
| RefDes | Qty | Capacitance | Voltage | Mount | Diameter/Size | Height | Lead Spacing | Temp | Type | Brand | Series |
|---|---|---|---|---|---|---|---|---|---|---|---|
| 1 | 47 µF | 100 V | SMD | 10mm | 10.5mm | 4.7mm | 105°C | Aluminum Electrolytic | Semtech | CS |
Replacement Parts
If parts are not available or different☃☃ selection is preferred, you can use the values in the Original Parts section to perform a parametric search
| RefDes | Qty | Compatible Part Number | Order Links |
|---|---|---|---|
| 1 | UUX2A470MNL1GS / UUR2A470MNL1GS | Digikey Mouser LCSC |