Disassembly:NEC VERSA 2760MT: Difference between revisions
Jump to navigation
Jump to search
(Add text to disassembly) |
(table css formatting) |
||
(2 intermediate revisions by 2 users not shown) | |||
Line 1: | Line 1: | ||
{| class="wikitable" | <div style="display: flex;justify-content: space-between;flex-wrap: wrap;"> | ||
|+ | {| class="wikitable" style="display: inline-block;margin:auto;" | ||
|+ CMOS NiMH battery repair | |||
! | ! | ||
!Motherboard removal disassembly steps | |||
|- | |||
|[[File:Nec versa 2760mt.jpg|thumb]] | |||
|Remove battery and external power. | |||
|- | |- | ||
|[[File:Nec versa 2760mt palmrest.jpg|thumb]] | |[[File:Nec versa 2760mt palmrest.jpg|thumb]] | ||
Line 42: | Line 46: | ||
Disconnect IO board from motherboard. | Disconnect IO board from motherboard. | ||
|} | |} | ||
</div> |
Latest revision as of 17:41, 9 February 2022
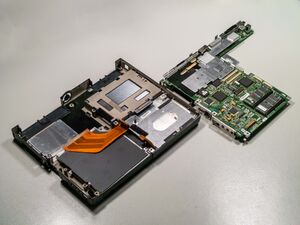
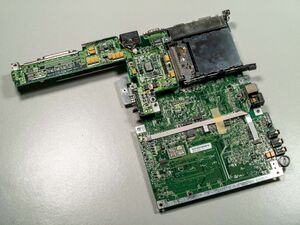
Motherboard removal disassembly steps | |
---|---|
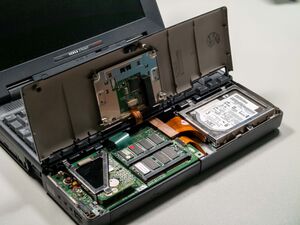
Remove battery and external power. | |
Unscrew the palmrest from the bottom side. | |
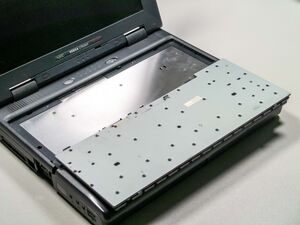
Unscrew the HDD and modem PCB to allow access to keyboard screws.
Slide keyboard towards palm rest and remove. Careful of keyboard flat-flex cable. | |
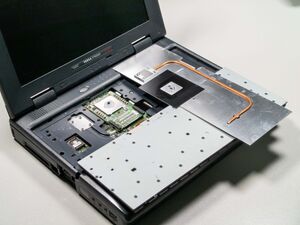
Unscrew all heat spreader screws to remove. | |
Unscrew CPU screws.
Remove CPU gently from high speed interconnectors.
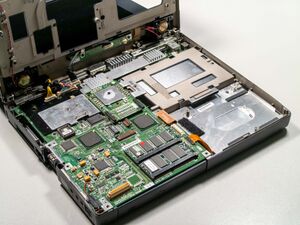
Lift up top case gently, it will not require much force. Careful of LCD cables. | |
Disconnect LCD cables. | |
Unscrew all screws holding motherboard assembly into bottom case.
Remove CD and floppy cables. Remove any PCMCIA cards and stow eject latches Lift motherboard assembly out of bottom case, you will have to lever out the left side IO carefully. | |
Unscrew remaining screws and rear IO nuts.
Disconnect IO board from motherboard. |